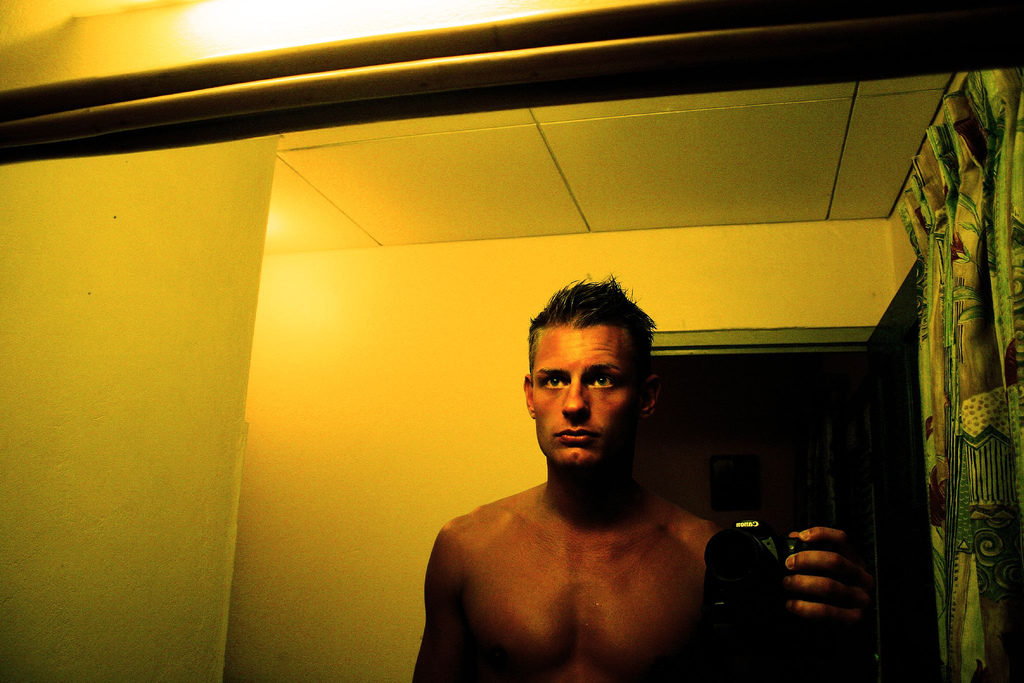
Don’t Use This Bathroom Mirror Selfie

Use This Professional Photo Instead
The Professional Bio Statement that you are working on for your first major project needs a professional photo that shows readers both what you look like and something about your personality and style. I know that none of you would use a bathroom mirror selfie, but based on what students have submitted in the past, I want to provide some specific guidelines.
What to Wear
- Wear the kind of clothes that you would wear to work or to an interview. Be professional.
- If you are pursuing a military career or currently in the Corps, a photo in your uniform works for this assignment.
- Don’t use a photo in which you are wearing formalwear. Ring Dance or Wedding photos of you in a tux or formal dress are not appropriate. Your readers will know you are trying to make-do with a photo that was clearly for another purpose.
Choose Your Setting
- Take your photo in a neutral location or in the kind of workplace where you hope to be employed. For instance, a photo on a construction site would be fine if you’re a building construction major.
- Alternately, take your photo in a location that relates to your career. If you are a planning to be a veterinarian, you can take a photo with your horse in the stable or outside with your dog.
Eliminate Distractions
- Be sure there is nothing unusual in the background of your photo. Check for anything that is out of place. You want your readers to focus on you, not the background.
- Ensure that the photo focuses on you. Your significant other and friends do not belong in the photo. Crop out anything that doesn’t belong.
Read More
You will find a lot more useful tips in the step-by-step tutorial in the Hubspot post How to Take Your Own Professional Headshot: A Bookmarkable Guide, which says it takes 15 minutes to read. The article covers everything from how to set up your camera to editing your final choice.
Take advantage of feedback from your writing group as well. If you can’t decide which photo is best, ask them to help you decide.
Photo credits: Self Portrait in Barbados by Jens karlsson on Flickr, used under a CC-BY license, and Me for Lindberg glasses by Jens karlsson on Flickr, used under a CC-BY license.
37 Comments
I found the article really helpful about how to take a professional headshot. So many people who play sports at Virginia Tech already have a headshot. The ones that I have seen from Virginia Tech, the athletes have on a suit and a tie (for guys) and either a dress or type of suit (for girls) and the background is usually neutral. In this post it mentions how it can either be taken in a neutral location or at a location that is where you might be employed. I found this interesting because most times in the headshots that I see from companies, the people are wearing some type of suit with a plain background. I never have seen a professional headshot that has the person at the place that they work. I am interested in going into the transportation design aspect of transportation. I find that for my future job, it will be hard to capture that in a headshot. So I am guessing that for the professional bio picture I will just have to take one that is in a neutral setting.
This article made me realize that I need to go out and take some good headshots. I have been using a cropped photo from my senior prom throughout all of college. I like the idea of taking a photo in an area that would relate to my profession. I cannot think of a location on campus that has professional looking backgrounds so I may take some photos around a computer lab. The “rule of thirds” was also an interesting concept. When looking at those two photos side by side in the article, it was very obvious that the better cropped photo was better. However, I have never thought about this concept before. I do not think that my current professional photo is necessarily “bad”. Although, I believe that following the guidelines in the article will make me look much more professional and mature which could make a difference when I’m looking for a full-time position.
One thing I found sort of strange in the article was the poses that they viewed as “acceptable” for a professional photo. It made sense that you want to show your personality and have an eye-catching photo, but they seemed more suitable to just having a nice picture, not a nice picture to use in the workplace. For example, one of the very first pictures was of a guy posing holding his chin. It made him appear thoughtful, but I have never actually seen such a pose in a professional setting.
I thought this was interesting/strange as well, but I’m thinking it all depends on your desired audience. For our professional bios, we are writing with a chosen audience and use-case in mind. So if the audience you chose to write your bio for is accepting of a less-traditional headshot, then feel free to let loose.
The biggest thing that surprised me about today’s post is the encouragement to use your phone for pictures. I never considered your phone to have good enough quality for a professional photo. However, I did not consider that it may be the only camera resource for some. Their tips on how to get a quality professional photo with only your phone were noteworthy, especially if I cannot locate a friend willing to help me. The tips on cropping photos correctly were also interesting because that is definitely something I struggle with as I forget the restrictions put on profile pictures on different platforms.
As someone who has their phone as their only camera resource, I definitely appreciated the article pointed towards using it! But I did find it a little frustrating to read on about how big of an investment this one photo will be. It says 2+ hours for the photo shoot, but I’m guessing it will take longer if you end up having to do it solo. And that’s not even including the amount of time it takes to go shop (and pay for!) all the equipment such as lighting and a tripod, which I (and most likely others) don’t have sitting around.
I think the article was very informative and very detailed as it went through every single step for before, during, and after taking pictures. I believe that the most important aspect of taking a professional picture is your facial expression. For example, in the picture shown above in this discussion post, the man has a very serious and straight face. Although having a serious face is good as it shows maturity and professionalism, I believe that having a more lighthearted expression such as smiling draws the attention of employers more because it makes the person come off as more approachable and someone that is easy to get along with. Just my personal opinion!
This is a very helpful article. I think it is something that is often overlooked as “not important”. The most beneficial thing I took from this article was the idea of taking a picture of something related to your field. When I think of professional photos, I usually think of a standard headshot in business casual attire.
While I agree that taking a headshot of something related to your field is a unique idea, I can’t think of something related to my professional field that I would be comfortable using for a headshot to companies. For something like Civil Engineering, maybe taking a picture in a hard-hat could be a good idea, but for more science/lab based majors, I wouldn’t want to do something like a lab coat or science lab for a picture. What do you think?
Great article! I liked how it said “look straight at the camera but angle your body”. This gives the picture some structure. The rule of thirds was helpful as well. The difference between the two headshots given to demonstrate the effect of the rule of thirds was significant. I looked at the first one and the thought that went through my head was “Eww, that look unproportioned”. Coincidentally, I was looking through LinkedIn yesterday and saw a profile picture that looked terrible which ruined the entire page. The man had a light blue shirt on, was standing in front of a background of the same color, and the photo was exceedingly over lit, giving the man an unnatural complexion. A tip I can give from being in several photo shoots and talking to some professional photographers is when taking a headshot, stick your chin out slightly which results in a more defined jaw line. Because the picture is from a forward facing direction, that slight adjustment is unnoticeable unless exaggerated.
I found this article to be very interesting. Every year my sorority does head-shots since we are a professional sorority for engineers. I went through the article and compared my head-shot to things that are considered acceptable for one both in the article and the discussion post and found that my head-shot met most of the requirements. The one thing I found very strange was the amount of time that the article said to set aside for taking the head-shot. They recommended 2-3 hours minimum. I thought this was a little excessive because I think if you plan ahead it won’t take that long at all, just be prepared.
I think the recommendation for 2 hours of shooting is too conservative too. If the equipment was ready and the person who was going to take the photo dressed properly, the shooting should be able to finish within half an hour.
While I agree that two hours does seem like a lot of time, I think it’s also good to remember that this article was discussing starting from scratch for the average-Joe photographer. My sorority similarly does headshots every year, and each time slot is only about twenty minutes. But that’s more of an assembly line of headshots, rather than one person going out and doing it themselves–plus the time doesn’t include getting ready, any editing needed, and choosing the photo. I would say that getting it done when one of these opportunities presents itself is a good idea, it saves lots of time and money!
I found the article especially helpful. I had thought professional photos were supposed to be serious, but I liked the look of the examples provided. I didn’t think about cropping and the rule of thirds. The most helpful parts of the article for me were the examples. Since there is such a wide variety professional photos on LinkedIn, Facebook, Instagram, and Twitter, it was nice to see examples of good and bad photos side by side so I can know what to look out for.
I really enjoyed the article! I thought it was extremely insightful into taking a professional head shot. One thing that surprised me was the amount of time and pictures it would take. They recommended taking several hundred photos over the course of at least 2 hours. I was thinking that it would take 2 hours max and take at most 100 photos. I thought that it was a great idea to try to make yourself laugh to loosen up. I know for me whenever I try to take a photo, I have the most natural smile whenever I am laughing and hanging with friends. Other types of scenarios seemed too forced. Also, I do not know if I find it completely necessary to buy extra lighting equipment. My friends have taking professional photos before and they did not have any extra lighting other than the natural lighting. Overall, I thought the article was fantastic and I will definitely be incorporating some of the tips for when I take my professional business photos.
I’ve never had a professional photo taken of myself. This article was very helpful in giving me some beginner level information on how to click a professional photograph. Although, the “Read More” link provides a lot more information, and goes into great detail to take the perfect professional picture. Who knew there was so much setup involved in clicking a picture? I also didn’t know it was okay to touch up the photo using editing apps. I am definitely going to use this article to take my professional picture. It’s about time I got one.
Having a professional photo of myself has never been an area I have really focused on. For the past couple years, I’ve been using a photo from my sister’s wedding during my freshman year of college. Since reading this post and the associated guide, I’ve realized I need to reconsider the photos I use. First impressions are often decided on the visual photos the user first sees on professional social media sites like LinkedIn. With that being said, I will definitely be looking to take new professional photos in the near future. I will look to employ some of the tips gained from these posts.
As a male, I never put a second thought into taking a photo. In this past, I smile and someone takes my photo. I didn’t care about the angle, the proportions, the lighting or the location. I just made sure I didn’t have food in my teeth or something in my hair. So it is no surprise that my first “professional headshot” was not my best effort. After reading the article, I realized that I did not take anything they said into account. I liked how they emphasized lighting by giving simple examples of how lightning can make or break a picture.
As mentioned, it’s important to have a decent professional photo taken for certain purposes and must not be a selfie or a dark picture. For that reason, it’s considerable why lighting can actually make or break a picture. I also feel the same way when it comes to getting pictures taken, either of me alone or with others. Some would like to put effort into their “look” for the picture and some would act as casual as they usually do. Nevertheless, I’ll make sure I have a decent professional headshot taken of myself for our first major project as I can finally identify myself properly!
I found this article useful in determining whether or not a photo is acceptable for a professional environment, including LinkedIn. Luckily, I had a professional photo taken for the purpose of posting on job websites (i.e. LinkedIn). However, in a few years, I will likely need an updated picture so I will definitely keep these tips in mind! Additionally, since I am at the age where a lot of my peers are struggling with the same dilemma of what type of picture to use professionally, a few months ago one posted an article on social media that I feel might be useful to my classmates. The article on Huffington Post explains a website that claims to determine whether or not a photo is professional enough or not. I While I have not personally used it, I highly encourage others to check it out–
it seems like a pretty cool and useful tool! youhttp://www.huffingtonpost.com.au/2017/02/21/this-site-tells-you-if-your-linkedin-headshot-is-professional_a_21718041/
I found the article you suggested us to read to be really cool! I like the idea of having the Snappr app telling you whether or not your picture is ideal enough for LinkedIn. I think especially with a professional site where you’re trying to appeal to people in your industry, it’s imperative to have a good facial expression, smile, lighting and overall impression. You only get around 10 seconds for people to form an opinion of you, so having a good picture will lead them to read your summary and profile which will then hopefully lead them to read your application.
I found that this article had way more detail in each step of taking a headshot then the ones I’ve found in the past that simply tell you to choose good lighting and make sure to smile. I like that they added information regarding the iPhone and how the back facing camera has a higher resolution and you can choose settings that will enhance the quality of your photograph such as “anti-shake” and using photo editing apps. I found the most helpful information being to scrutinize the pictures as you go because you may not know what you’re looking like or how your energy looks in the camera, so taking time to look at every handful of photos before going ahead and taking more photos was very interesting to read about. Time is also another important part of this process that I learned about. Too many times people try to rush in and out of what they’re doing, but if you try and rush taking a good picture, the outcome will most likely look rushed.
I think the most useful part of the external link provided, is talking about the rule of thirds. For all my professional head shots I have used in the past, I have always centered them. But it makes sense that your eyes are the focal point of a head shot. Eye contact is a huge part of interaction with future employers, and since it is a picture, and body language and verbal communication are not possible, your eyes are the most important aspect of the head shot. Centering the head shot around your eye makes the viewer feel more in contact with you, and makes you stand out more in a professional setting. Also making sure that you are looking straight into the camera lens is important, because that is just how you would talk to someone if you are trying to get employed, you would look them straight in the eye. Another important thing I have not done in the past is edit and touch up the photos I have taken, because I did not want it to look unnatural, but perhaps if I take the time to learn, I can successfully edit photos, to make them look nicer, and bring out certain colors, without losing a natural feel.
This article sold me on the idea that it is important to have a professional headshot. Some skills are outside of my wheelhouse to execute properly. I also do not beleive that the second photo was not taken by a professional photographer. What I learned is give photography a college try and then look for a professional to get resume head shots.
I like how the article provided pixel dimensions for certain social media sites because there could be problems with formatting when you’re trying to upload a rectangular photo in a square. I had trouble moving the Canvas photo around to my liking. When uploading my photo on Canvas, it flipped my photo sideways (I had to save it sideways to counteract this…). In addition, I would like to mention how the camera quality of an iPhone is poor. When you click on a profile picture, sometimes the website displays an enlarged version that comes out blurry (i.e. Facebook). This shouldn’t matter if no one clicks on the picture because the article said that Facebook uses 400 px by 400 px, but I thought it was worth mentioning.
On a side note, I don’t understand why a photoshoot would last two hours. The only thing that can be changed is your face and torso area. There isn’t much variety one could do! But, then again small details are important because profile pictures are first impressions. Relating to detail, I switch around whether I smile with my mouth open or closed. Smiling with your mouth open gives off a happier vibe, but I am not great with open smiles; so, I hide my awkward smile with the closed mouth smile.
My Canvas photo was done outdoors, except unlike what the article said, my background had trees which aren’t a neutral color. I wore a button-down shirt, but it had stripes, so I should retake the photo. My profile picture did follow some of the instructions mentioned in the article – take photo in shade, facing the sun, and following the two-thirds rule.
While this article does provide a lot of good tips on how to create a professional looking photo either by yourself or with a friend, there are also many other options available out there. For someone who wants their picture to look as professional as possible, there are are a few photographers or agencies that can help you produce a truly “Professional” photo. Obviously this is not the only course of action you could take. It is important to keep in touch with the community and community events that can be used to your advantage. During my Freshman year, Galileo (the living learning community I was a part of) hosted a “Professional Picture Day”. During that time I was able to have my picture taken in front of an appropriate background with good lighting and a good quality camera. I still use the photos taken then to this day. I think such events are exceptionally useful and I encourage others to look for the same opportunities where they live.
Anyone have advice about how someone with severe anxiety about being photographed should get professional photos? I’m so uncomfortable with the way I look that only a handful of photographs of me have ever existed, most of them without my consent. The prospect of taking hundreds for something like this makes me unbelievably anxious.
I like the variety of options for this assignment. I like that it doesn’t have to be formal, but something professional and relevant to what we’d look like on the job. For me, that might actually be a t-shirt, but I still have a good photo of me in a work button-up with a blank background. I also liked the note about reasonable backgrounds, though I’m not sure how well that’d work for a CS major. If I had a background of a Linux system with some terminals open, it’d be borderline distracting. It’d have other workspace objects in the background too. I think my best option is a clear wall behind me with business casual attire.
I definitely agree with the importance of having a professional photo of one’s self. Making a good professional appearance on a website like LinkedIn could be the difference between getting an interview or being passed over, no matter how qualified you are. I thought some of the advice in this article was very interesting. I took several years of photography classes in high school so a lot of the information was old news for me, but there were definitely a few things in here that I had never learned before. For instance, I never knew that the ideal photo was with your body sitting at a 30 degree angle to the camera.
I am planning to use the headshot taken for my Visa application to be used in my Professional Bio as it looks professional enough based on the guidelines given by the above article except for one slight problem. When I opened the photo in full size my face was smiling but not that wide so when viewing it in mini profile size it seemed like I was not smiling at all. What worries me is that eventhough it looks formal but I do not want to give a first impression to the company or organization that I am a dead on serious person like what is somehow portrayed.
However, I am planning to put my picture in approximately full size for my Professional Bio so it may or may not be a problem. I would definitely need feedback from my writing group regarding this issue besides other writing issues and I believe that they are willing to help.
I found this article very helpful. I have not taken a professional photo before and have been meaning to take one for some time. I never realized all the subtle techniques you can use in a picture, such as taking it in a place that relates to your profession. Although doing little things like this may appear non-important, I believe the small attention to detail can go a long way. The only issue I have with this post is that the example of a good professional photo on this page does not seem all that professional, because he is not dressed too professionally. However, the content of the post is very useful. Additionally, I did not realize it was allowed to use editing techniques on the photo. I am not sure if I will end up using anything like that, but worst case scenario I know it is acceptable.
Well to be honest I never took something called professional photo. For myself, it’s just weird to dress up, find someone, choose the field, take care of the angle and the lights. Those picture are just not natural at all, and sometimes if you want the picture looks better you have to photo shop a bit about it to make some kind of style as “showing off personalities.” It’s just weird. But I read the article from the given link and I would like to try this although it takes time for me to adapt it. It’s helpful for me because I’m going to have one of this kind of photo in the future eventually.
Reading this article made me realize that I should probably get some kind of professional headshot done for any professional profiles I have. I’m not a big fan of having my picture taken, so the pictures I do use for any kind of social media account tend to be casual. I tend not to believe that whatever my picture is on a social media account should have that big an impact on what people think of me as a person. But this article does make a very convincing argument that might just prove me wrong. Since so many different people tend to view online accounts, and only do so for very short times, the only image someone can get of you is whatever your profile picture happens to be on an account. If you want people to think of you as a professional, then having a professional profile picture is a good start since that picture might be your first impression on an employer who is looking through many other online profiles as well.
After reading this article, I never thought about taking a professional photo in a place related to one’s field of study. I always thought it would be more professional in front of a plain background. Most of the points made in the article, however, I thought were common sense. But it’s always nice to have a good reminder on what to do and what not to do before taking one. Having a quality professional photo is a great first impression to an employer if they find you on LinkedIn or any other professional website.
I found this article very helpful. Before reading this article, I had no idea how to take a picture of me that looks professional .
I just wonder how a Computer Engineering major would take a professional picture. is a picture of me with the computer systems in the background OK?
I would have to think more about what I have to put in the background and the location.
Computer lab might be the place to go for people like me although there are just desks and chairs.
I find this post helpful because it teaches how to take a good head shot. Putting professional head shots as profile picture is significant because it can determine how people see or judge you. For instance, in sending professional emails for jobs and other significant things, it is necessary to put a good and professional profile picture because it makes a positive impression on the employer.
I appreciated this article and all of the tips it provided for taking an appropriate professional photo. From LinkedIn to a business’ website, I have seen many different variations of professional photos which has lead to some confusion for me as to what exactly is acceptable and unacceptable when taking this type of photo. Like many others, I was surprised that this article suggested the use of a phone camera as it seems like you would want to use an actual camera to ensure the best quality. However, after I thought about it I came to the realization that most phone cameras nowadays are as good as, if not better than, most cameras on the market today.